

Makeup Wars: My Must Have Hair Tools.
/I am obsessed with a great blowout. If I could have a professional blowout everyday, I would be one happy gal - with great hair. Seriously? Don't you feel better when you're rocking a beautiful bouncy blowout? Luckily, I have learned to do my own blowout at home. The key to the perfect blowout is the right tools and products.
For products, I like a product that initially smoothes my hair, as in defrizz and seals the cuticle to prevent it from fizzing in the first place. I use the original Moroccanoil Treatment for that. I also like a volumizing mousse, because I like a lot of volume and need the extra hold it gives. My current mousse of choice is Dove Nourishing Curls Whipped Cream Mousse. Finally, I need a hairspray to hold my style in place, and I only use L'Oreal Paris Elnett Satin Hairspray (unscented) for this finishing touch.
For tools, I need a great hair dryer and brush. The best hair dryer I have ever tried is from the famed blow dry bar, Drybar. They only do blowouts, so I trust that their tools are the best.
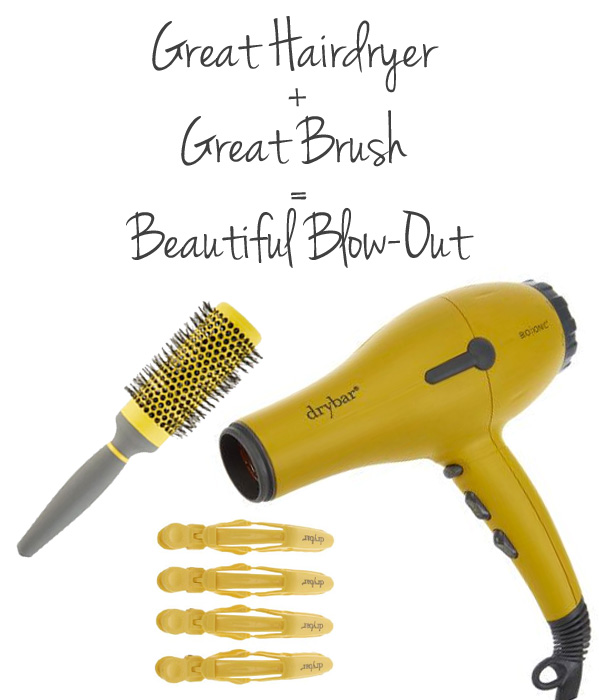
I use the bright yellow Buttercup Blow Dryer. This professional hair dryer has a powerful 1875 watts of power that is surprisingly quiet. It delivers a powerful airflow while being gentle on hair. It has three temperature settings, two speed settings, a self-locking Cool Shot button, and a narrow concentrator for fast styling. It is super lightweight, so my arms never get tired. My hair is dry faster with this dryer than any I have ever tested as well.
See also: My At-Home Hair Color Disaster
Along with the dryer, I depend on the Full Pint Medium Round Brush. This helps to smooth my hair while adding in big soft curls.
To aid in drying my hair in sections, I use the Drybars Hold Me Clips. These have a self-locking system that allows for large sectioning. They grip the hair gently, so I never experience pulling.
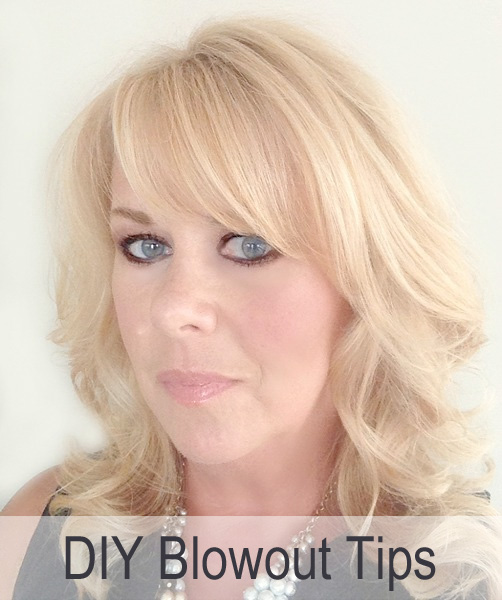
To do a great blowout at home, work in small sections. This is where the clips are essential. I usually work with seven or eight sections, but only clip off four sections at a time, on each side of my head. I dry each section at a time. I hold my hair taut with the brush making sure I point the dryer nozzle down toward the hair to seal in the cuticle. Once the section is dried, I wrap the ends around the round brush and again, pointing the nozzle down, add extra heat to the the section I am curling for about 10 seconds and then hit the cool button for about 30 seconds to lock in the curl. I move to the next section until my hair is completely dry. After all the clips are out, I curl back a few of the pieces that need more curl, again using the round brush and a quick heat/cool blow. When finished, I usually flip my head over and spray with my favorite hair spray and then flip back upright. I then just use my hands to separate some pieces and then make sure every hair is in place before I give it another mist of hairspray.
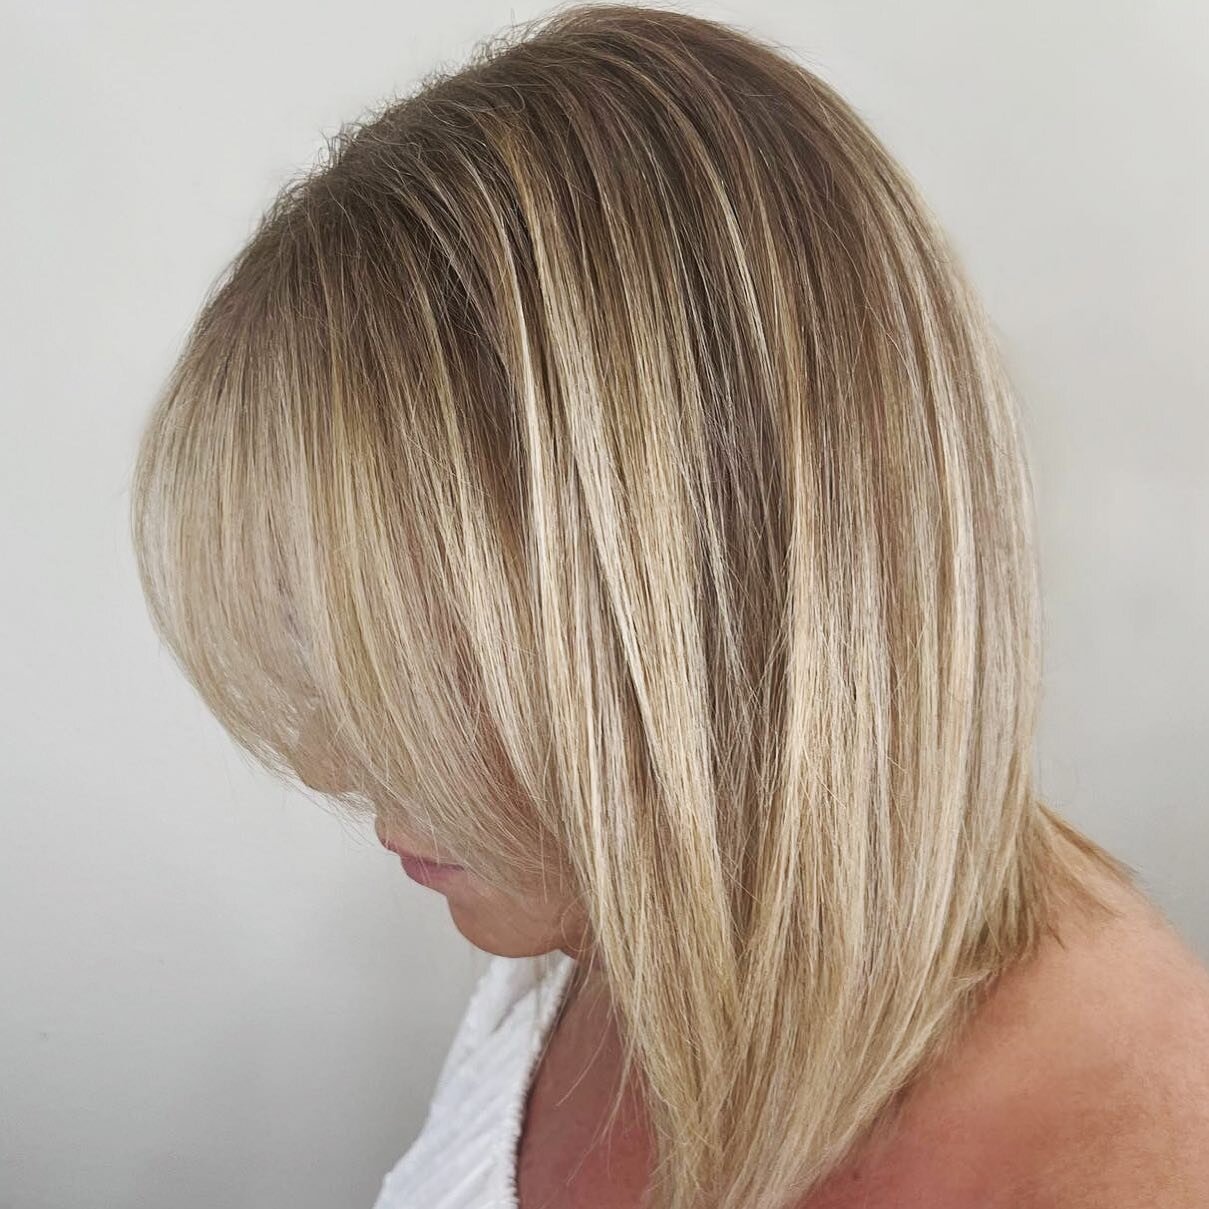
This is me after about a ten minute DIY blow out session with the Buttercup, Full Pint Brush and Hair Clips.
The hair dryer and clips can be purchased from QVC in their Drybar Blowout In-a-Box kit for $169.00. It also contains two different nozzles and an extra filter.
The Full Pint Medium Round Brush can be purchased at Sephora for $40.00.
Check out my Makeup Wars blogger friends to see their must have hair tools.